Bitnami made its PHPMyAdmin very secure in its stack, and you can’t access it by typing its path to the address bar like https://example.com/phpmyadmin. Instead, to access the bitnami PHPMyAdmin page, you should create an SSH tunnel that will allow you to connect to the localhost 127.0.0.1, and you can access the application.
How can you access PHPMyAdmin in the Bitnami stack over SSH Google Cloud?
For this, you’ve to go through the following steps:
- Download puTTY application
- Generate SSH key using this application
- Update or configure the publish key to host i.e. google cloud in our case.
- Configure the puTTY application for a localhost connection that would allow us to access PHPMyAdmin remotely.
- Session settings
- SSH auth key settings
- SSH Tunnel Settings
- and Connection data setting
- Save and Open session settings.
Download puTTY Application
First, you to download the puTTY application that will create an SSH Tunnel environment for the localhost. Then, it will be used to establish the connection between Google Cloud and the localhost machine.
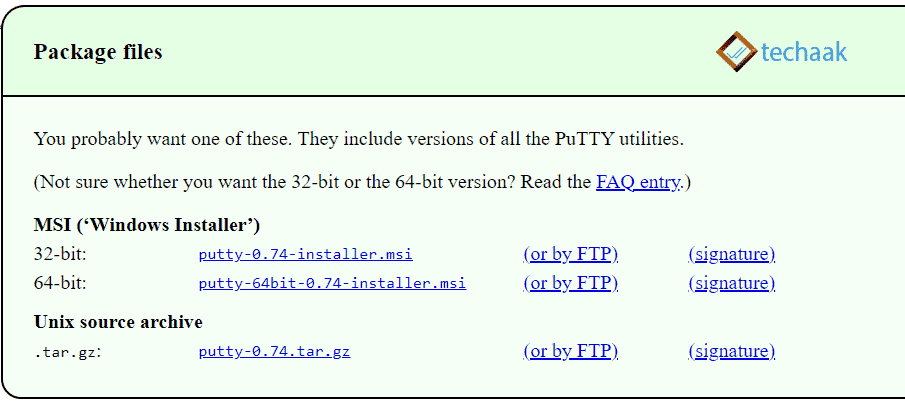
SSH Key Config
After installation, open puTTY, generate an SSH key and set it up on Google Cloud console Virtual Machine.
Generate SSH Key

Generate the SSH using the puTTY key generator. Please follow the steps in the same order as described below.
- Enter key comment as bitnami,
- Now copy the public key.
- Save the public key in a safe location for future use.
- Save the private key with the public key.
Note: Public key is for server-side service, and private is for the user side. These keys can be used for FileZilla and don’t place on public computers for security reasons.
Save SSH Public key to Google Cloud.
Now open Google Cloud Platform Dashboard and visit the section Compute Engine> Metadata.
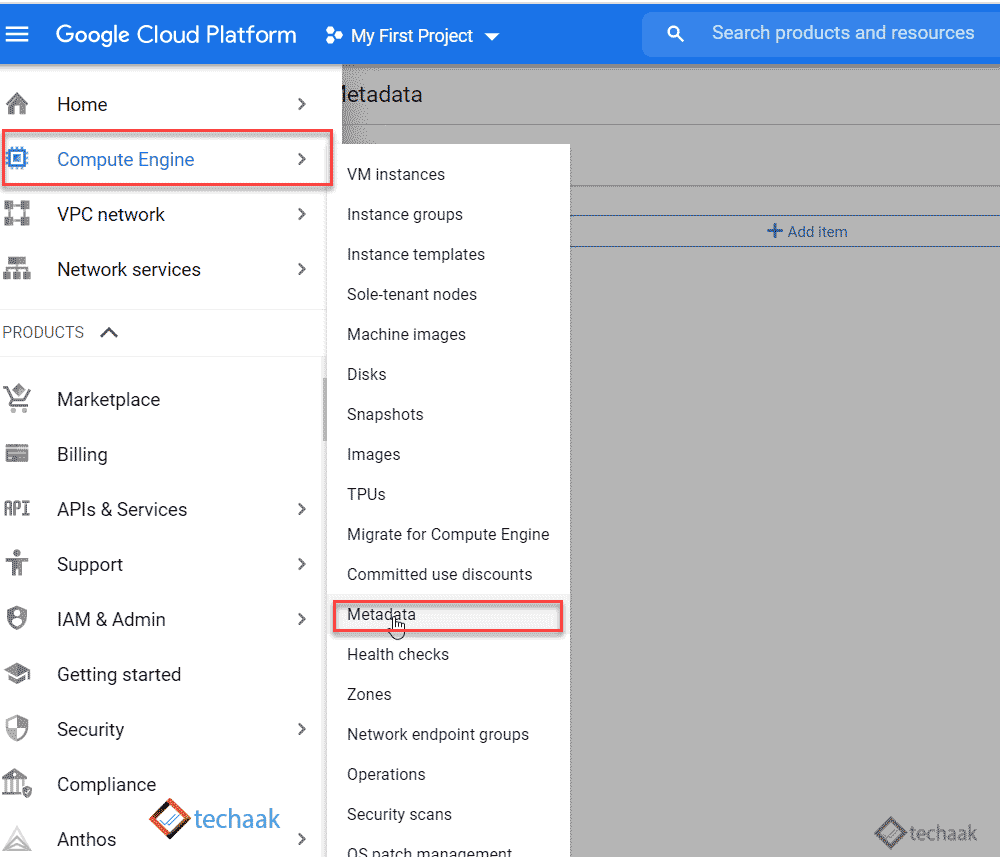
Now paste the public key (copied from the puTTY key generator) in the metadata section of Google Cloud.

- Paste the SSH key by adding a blank item.
- Save the settings.
Configure the puTTY application to access PHPMyAdmin Bitnami localhost.
Putty Session Configuration
Now you’ve to configure the puTTY application for the bitnami PHPMyAdmin access.
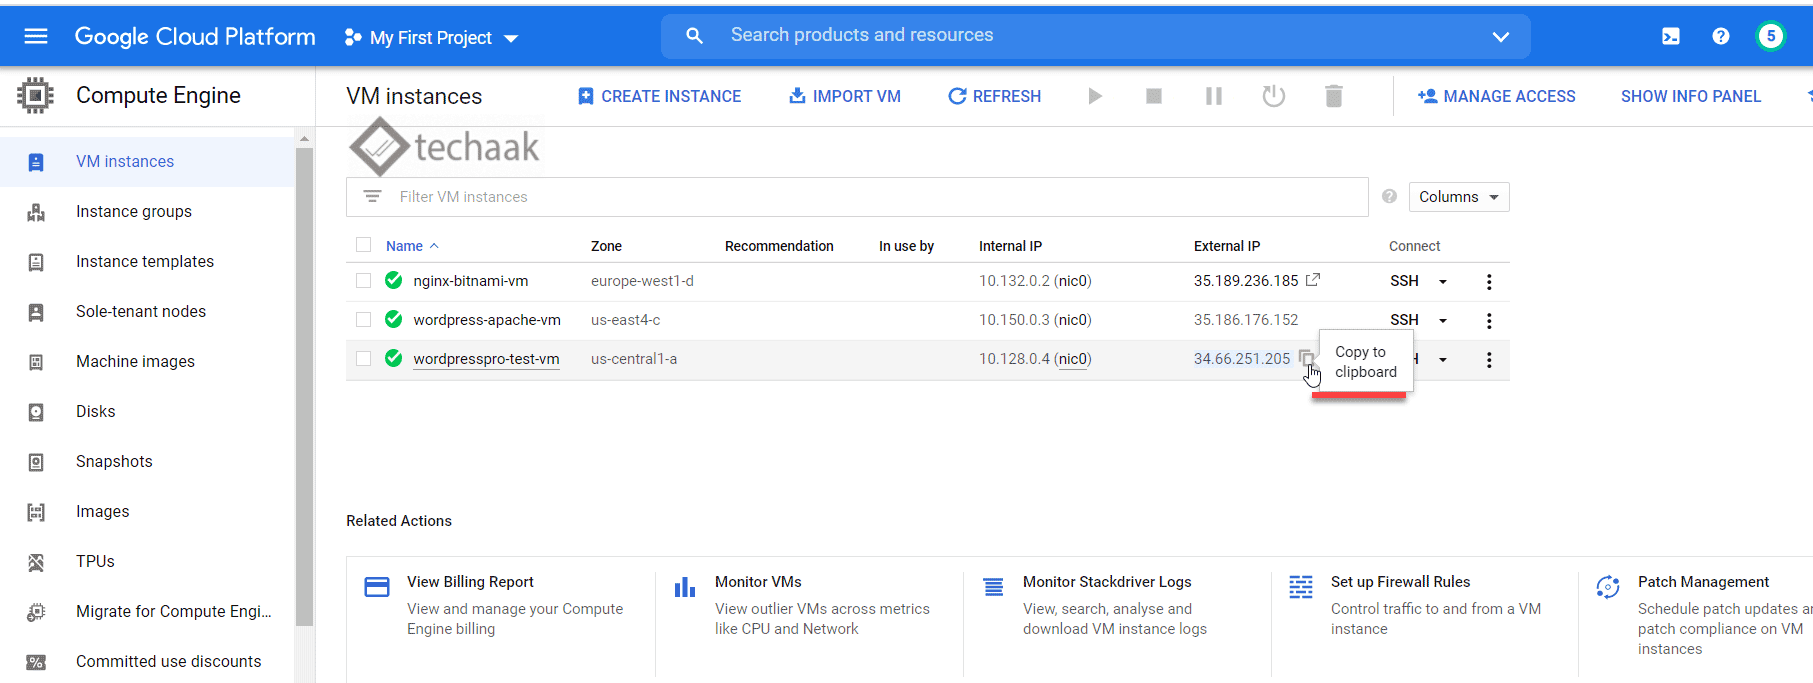
- Copy the IP address of the Virtual Machine VM.
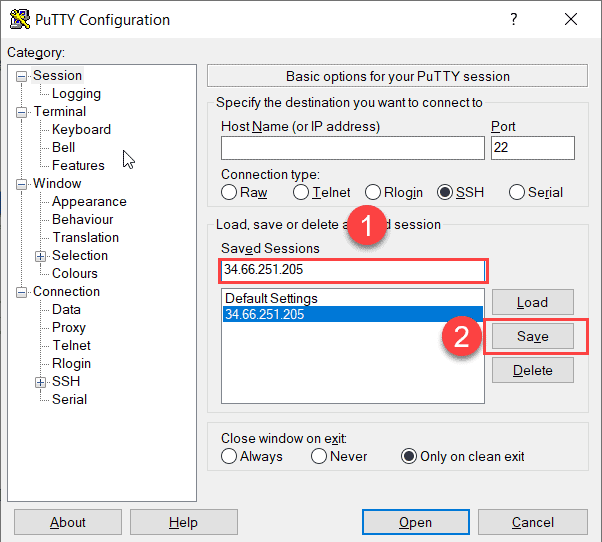
- Paste the IP address in the saved sessions
- Click on the Save button.
puTTY Auth Configuration
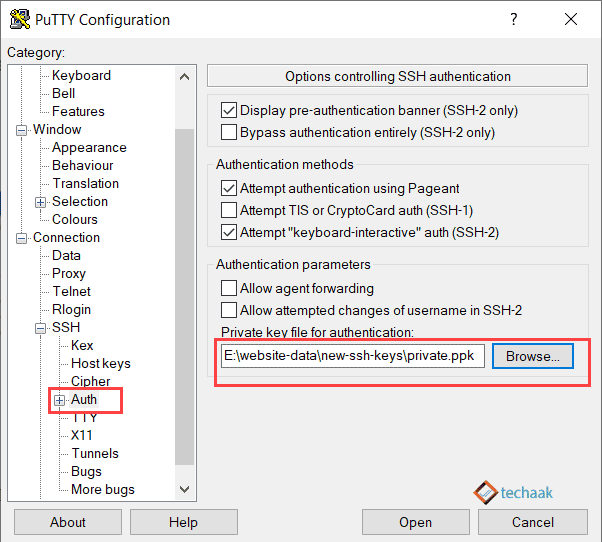
Now visit the auth section of the puTTY and provide the private key path for the SSH key generator.
puTTY Tunnel Configuration
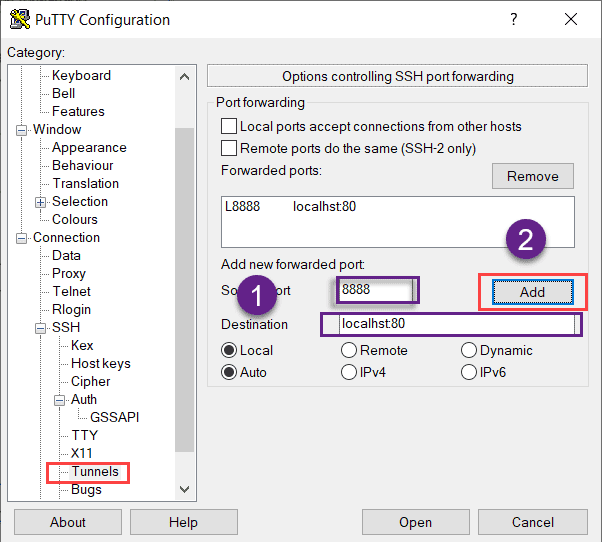
SSH tunnel Settings, Provide port number and destination as 8888, and localhost:80. You can also provide localhost:443 for HTTPS connections
- Provide the Source Port 8888 and destination localhost:80
- Click on add button.
puTTY Data Configuration

Connection data settings, provide auto-login name bitnami as displayed above.
puTTY Session Configuration Final
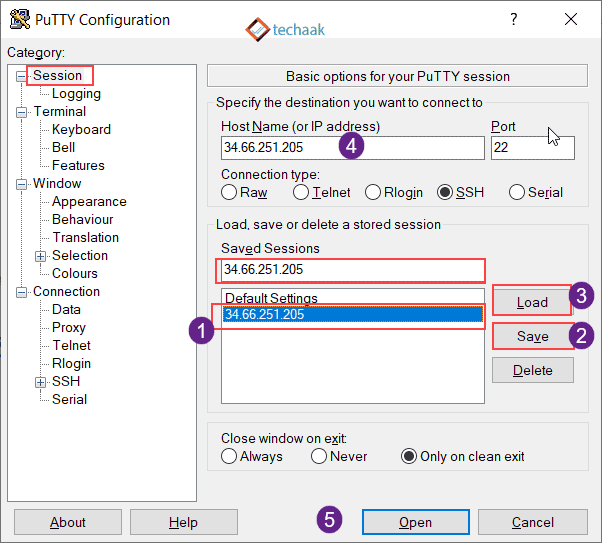
Final settings of session:
- Select the IP Address
- Click on the Save button
- Now click on the load button provide.
- Paste the IP address in Host Name (copy it from the saved session as displayed).

Putty Security alert: want to save the cache in the registry. Please click on No for security reasons.
Access phpMyAdmin of Bitnami Stack localhost

puTTY will start a connection now. And now you can access phpMyAdmin by visiting http://127.0.0.1/phpmyadmin for localhost:80, and https://127.0.0.1/phpmyadmin for localhost:443. If you are going to the HTTPS version, you’ve to click on Proceed to 127.0.0.1 (unsafe).
If you can’t access the PHPMyAdmin page, read this article.
The username for login is “root”, and the password is the initial WordPress password found in Marketplace> Your Solution.
Login Details of phpMyAdmin.
The default username of PHPMyAdmin is root. And password can be located in the Google Cloud Marketplace > Your solution. You can access it using this link.

- Visit Google Cloud Dashboard, Click on Your Solution.
- Choose your application
- Check your password.
This password can be used with username root in PHPMyAdmin.