
Google rolls out its core web vitals updates for all websites. I can see many websites benefitting from the theme, and at the same time, a lot of websites get down and down. Google PageSpeed Insights Tool recommends to server nextGen images. This article will discuss how we can serve the nextGen image to the Blogger blog.
Serve NextGen WebP Images in a Blogger Blog.
You can serve the Next Generation images for a WordPress website with the help of plugins. Unfortunately, Blogger blog doesn’t support plugins but is backed by a powerful Google Image Server. Google image server can serve the webP images, irrespective of the uploaded file format.
Serve NextGen WebP image Blogger.
Blogger has a powerful Google image server. That can serve almost every kind of image as per the request.
How can you upload a webP image to Blogger?
You can upload JPG, JPEG, and PNG images to the Blogger blog. Blogger automatically converts these files to webP format. Let’s understand how to request the nextGen image from Blogger: Upload an image file to the Blogger dashboard, as shown below.
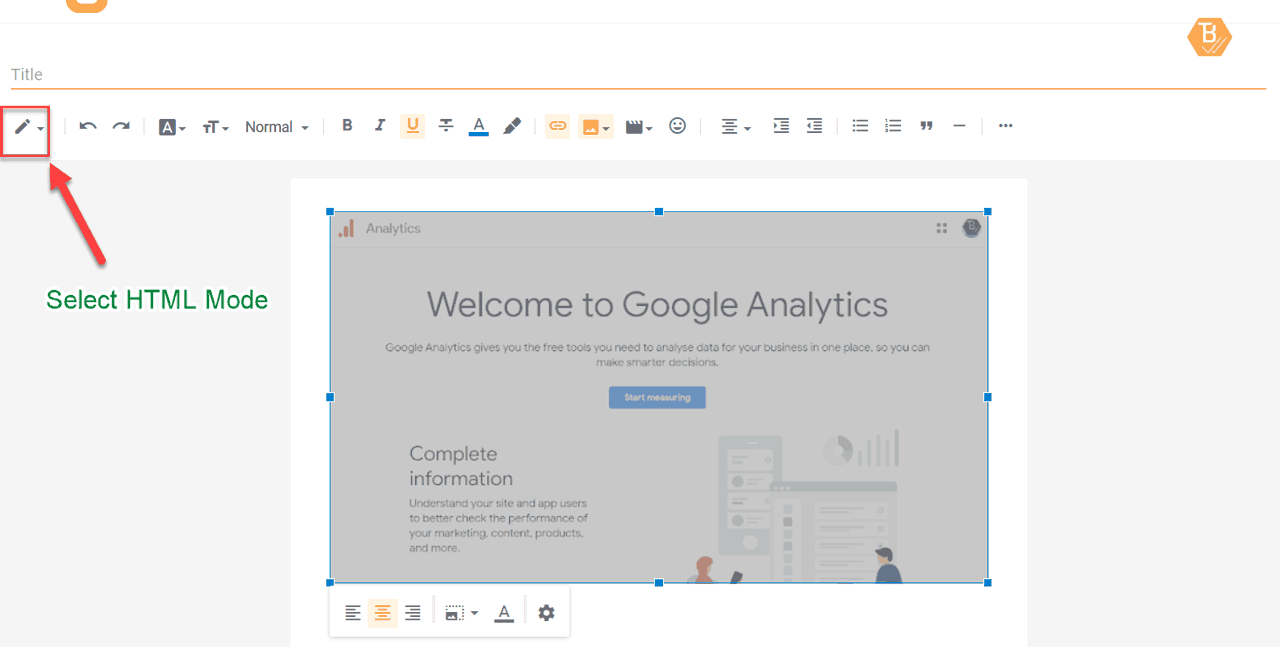
Now change the HTML mode using edit mode and click on the edit(pencil) button in the upper left corner. Select the HTML mode to convert to the Blogger image in webP NextGen format.
You’ll see a code similar to as shown above. You have to edit the source link of the image that is the tag.
You can serve different sizes and formats of images using the Google image server. To perform this action, change the value in size provided in the src code in the tag. In the above image, the size declared is s640 , which means a medium-sized image will serve, change s640to s320for small image size. Change the size values according to your need.
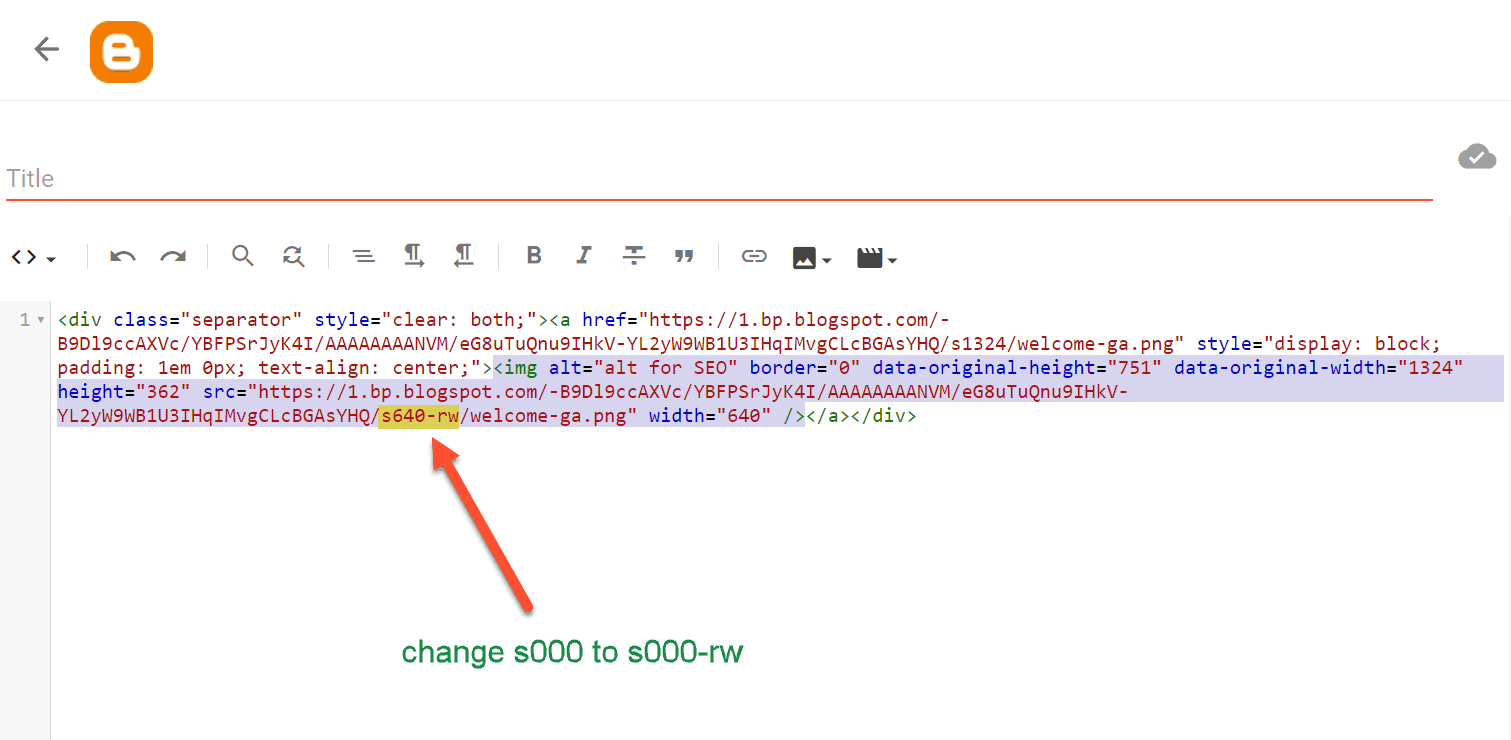
Using this -rw value in the image, you can serve the next webp images to Blogger. Just change s320 to s320-rw, or change s640 to s640-rw. You have to add -rw after the size value of the image for webP.
Blogger updated image URL structure(2022 update).
In 2022, Blogger discontinued the older structure for Blogger images and introduced a new structure. There is no change for old uploads.
The latest image URL structure of the Blogger carries image properties like size, type, etc.
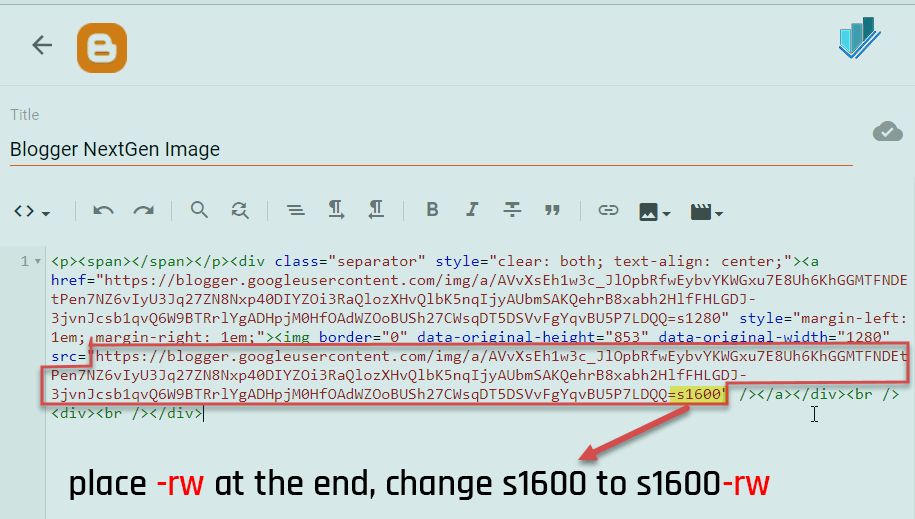
You have to place -rwat the end of the image URL and publish the content.
Now update your post, the image is now converted and served in webP format. You can check it by dragging the image on the desktop screen.
Follow the above step whenever you upload a new image to Blogger and convert that to webP NextGen format.
Is Your Theme Not supporting webP format?
Every image you covert will serve as a webP image. But, Is your Blogger theme capable of handling webP image requests?
It may create problems with your theme, like some gadgets may not be visible. It’s all because the Blogger theme you’re using is not supporting webP nextGen.
To solve this issue,Edit Blogger Themeand change the main theme function file (a long js file that is usually found just before the </body>tag).
You can add some updates to your blogger template or theme. These are.
replace('/s72-c','/s680')Replace the above code with the following code.
replace('/s72-c','/s680-rw').replace('/s72-rc','/s680-rw')You’ve to follow this for all similar codes in the main function file. If you’re using a free Blogger theme, then you have to decrypt the theme file.
If you don’t know how to do this? You can use our WebP image-friendly Blogger theme for the Blogger blog. This theme will serve all the widget images in webP format. But for the image inside the posts, you’ve to follow the -rwmethod for every image you upload.
I hope you liked this article on webP NextGen images for Blogger blog. In case of any doubt, feel free to ask in the comment section below.
JOIN THE CONVERSATION
Comments
Have a question or something to add? Comments are moderated and appear here only after approval.
JavaScript is required to submit a comment. Published comments above remain available to read.
15 published comments, including 2 replies. Threads shown oldest first.
In reply to Hanzla
In reply to Maxamed