
After installing WordPress, a new self-hosted website, you need to install WordPress plugins for additional features. Here in this tutorial, we’re discussing how you can install a plugin into the WordPress CMS.
How to Install a WordPress Plugin
Here we’re talking about installing plugins in the self-hosted websites on wordpress.org, not the wordpress.com website. If you’re running a wordpress.com website, you can transfer it to a wordpress.org self-hosted for a more controlled website.
What is a Plugin in WordPress?
It is a set of extensions that enables a WordPress website to perform additional tasks. These plugins are easy to install, run, and perform functions.
We can install a WordPress plugin by using these three methods.
- Install the Plugin from the WordPress plugin library (search and install method).
- Using a Plugin Zip File.
- Install using a plugin using FTP (File Transfer Protocol).
Install a Plugin From WordPress Library.
WordPress library contains a large number of a plugin. You can install a plugin through dashboard>plugin>add new.
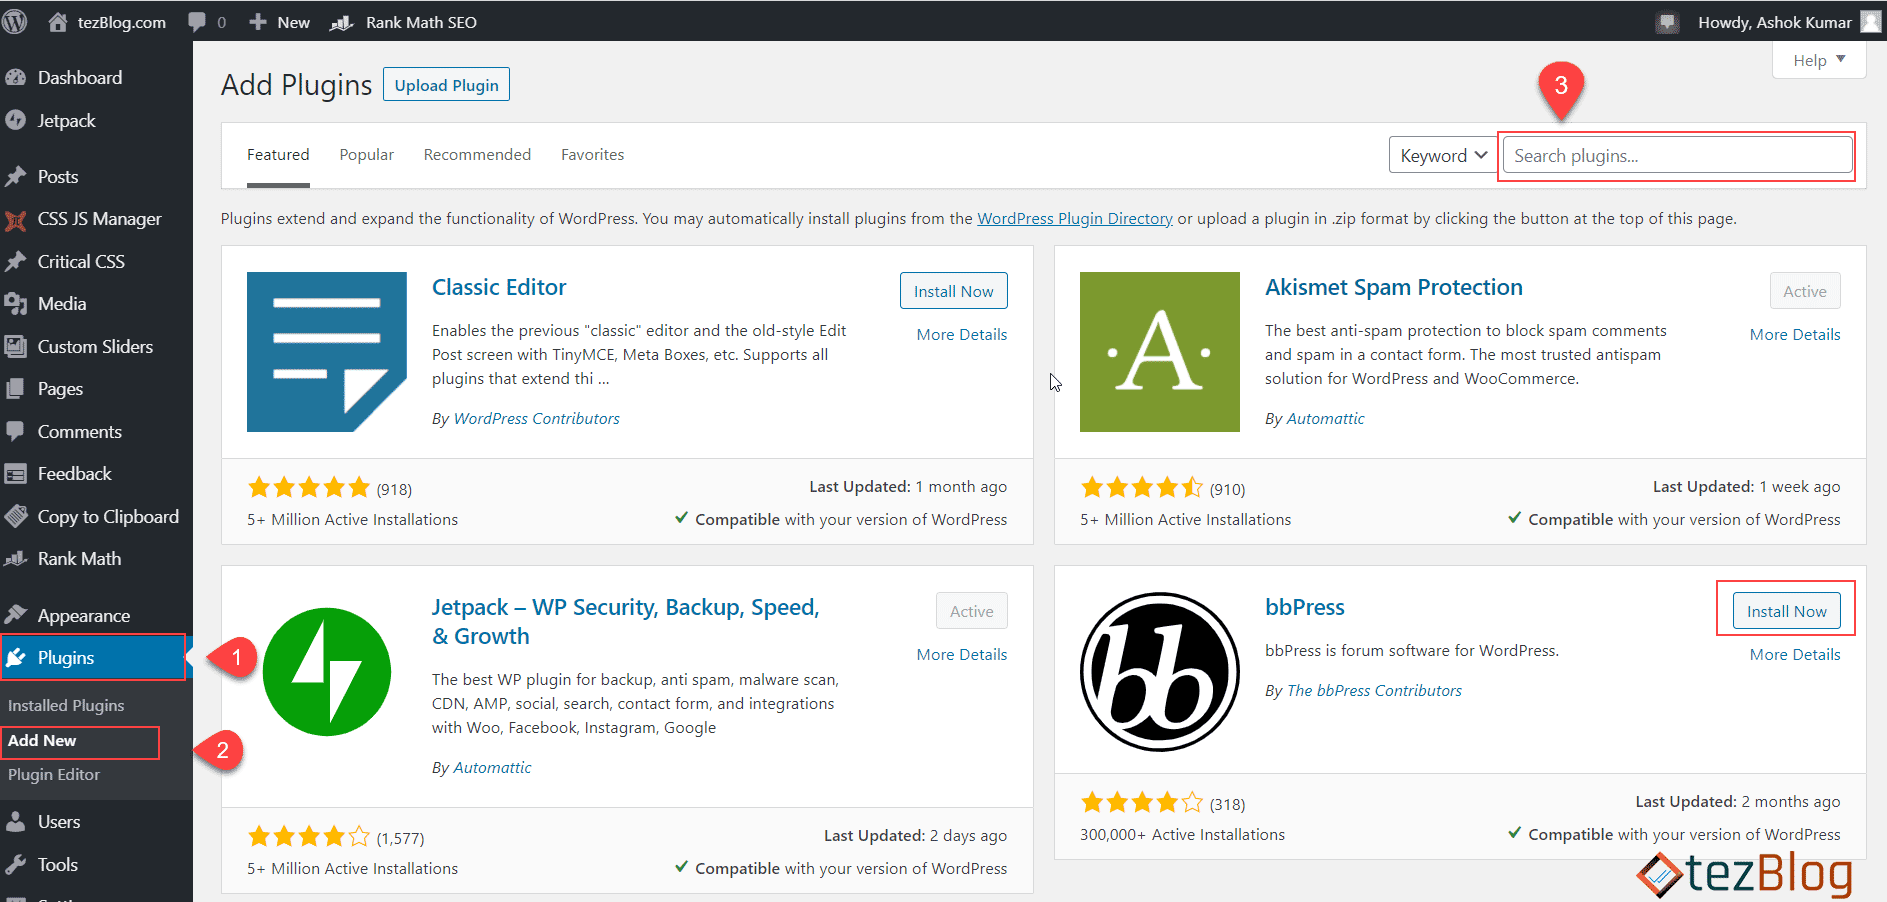
Installing a WordPress plugin from the library
- Visit Plugin Section from the right-hand side
- Click on Add new Plugin.
- Search for the desired plugin.
- Click on Install Now to the desired plugins.
- Now, after installing the activate option will appear, activate the plugin.
The plugin is now activated using the WordPress library within a WordPress website. If it is asking for FTP credentials, Learn How to Fix the FTP credentials issue.
Install a Plugin from the zip file.
If you purchased a plugin from any external source or downloaded it from WordPress Plugin Library, you can upload and install the WordPress plugin through this method discussed. In this method, we’ll upload a zip plugin file to WordPress directly.
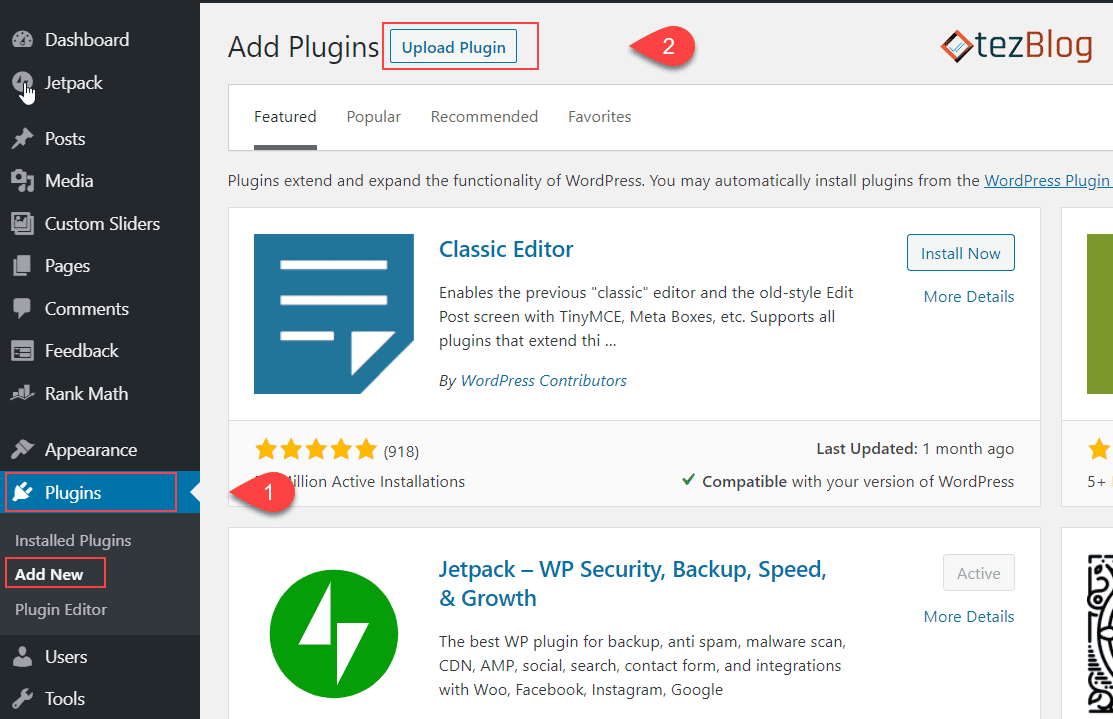
WordPress Dashboard Add zip Plugin
- Visit the Plugin section from the left-hand side and click on Add New.
- Click on Upload Plugins in the plugin section.
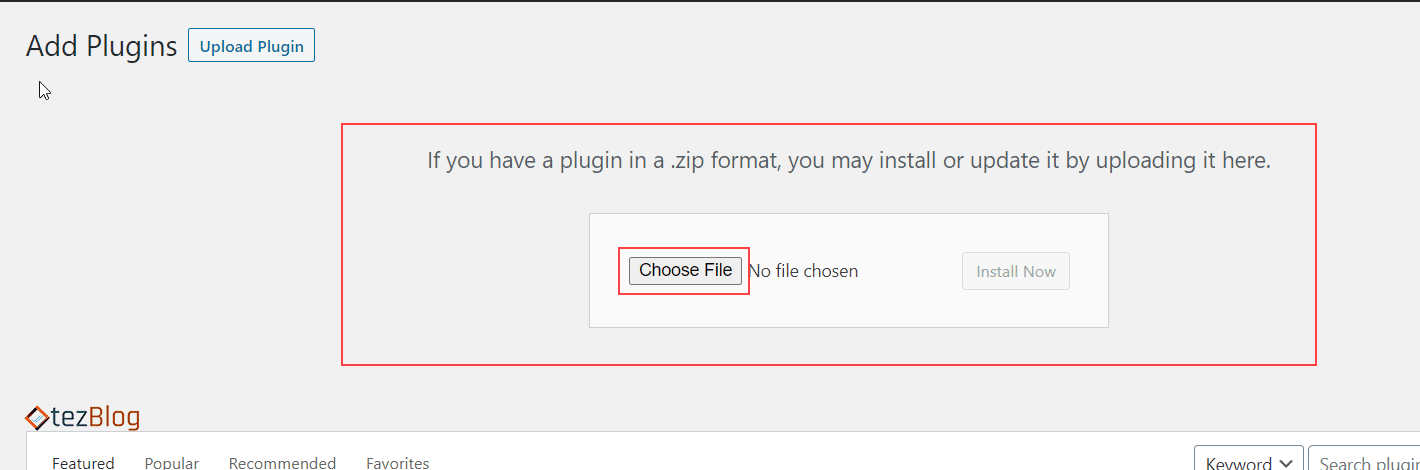
Upload zip Plugins
Now click on choose file and upload the file. It will take a few minutes to upload a zip plugin file, depending on your hosting speed and your internet speed.
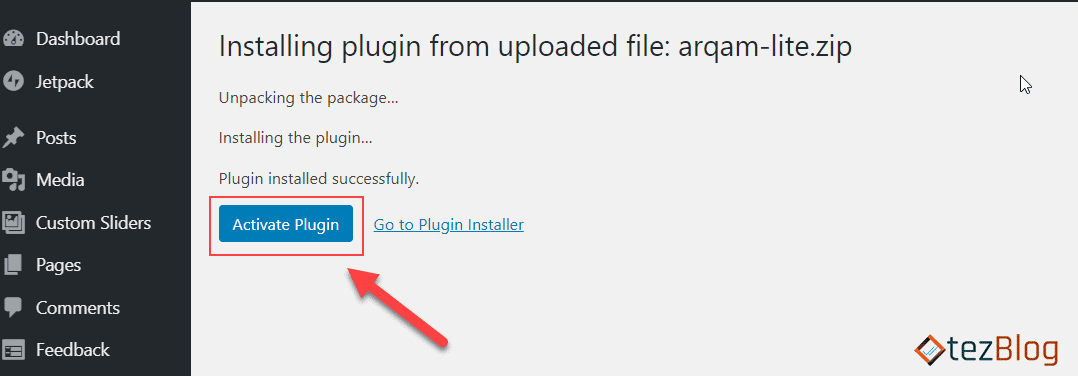
Activate the uploaded plugin
After a successful upload, you can activate the plugin as per your need.
Install a WordPress plugin via FTP.
You can upload an unzip plugin to the hosting directly using FTP. With the help of this method, you have to upload the plugin to the /wp-content/plugins/ folder. You can do this by using an FTP client like FileZilla or using cPanel. FTP clients will ask for login details. For that, contact your hosting provider.
- Unzip the plugin into your computer or mac.
- Connect to the server using the FTP client
- Upload the unzip plugin folder to the /wp-content/plugins/ directory.
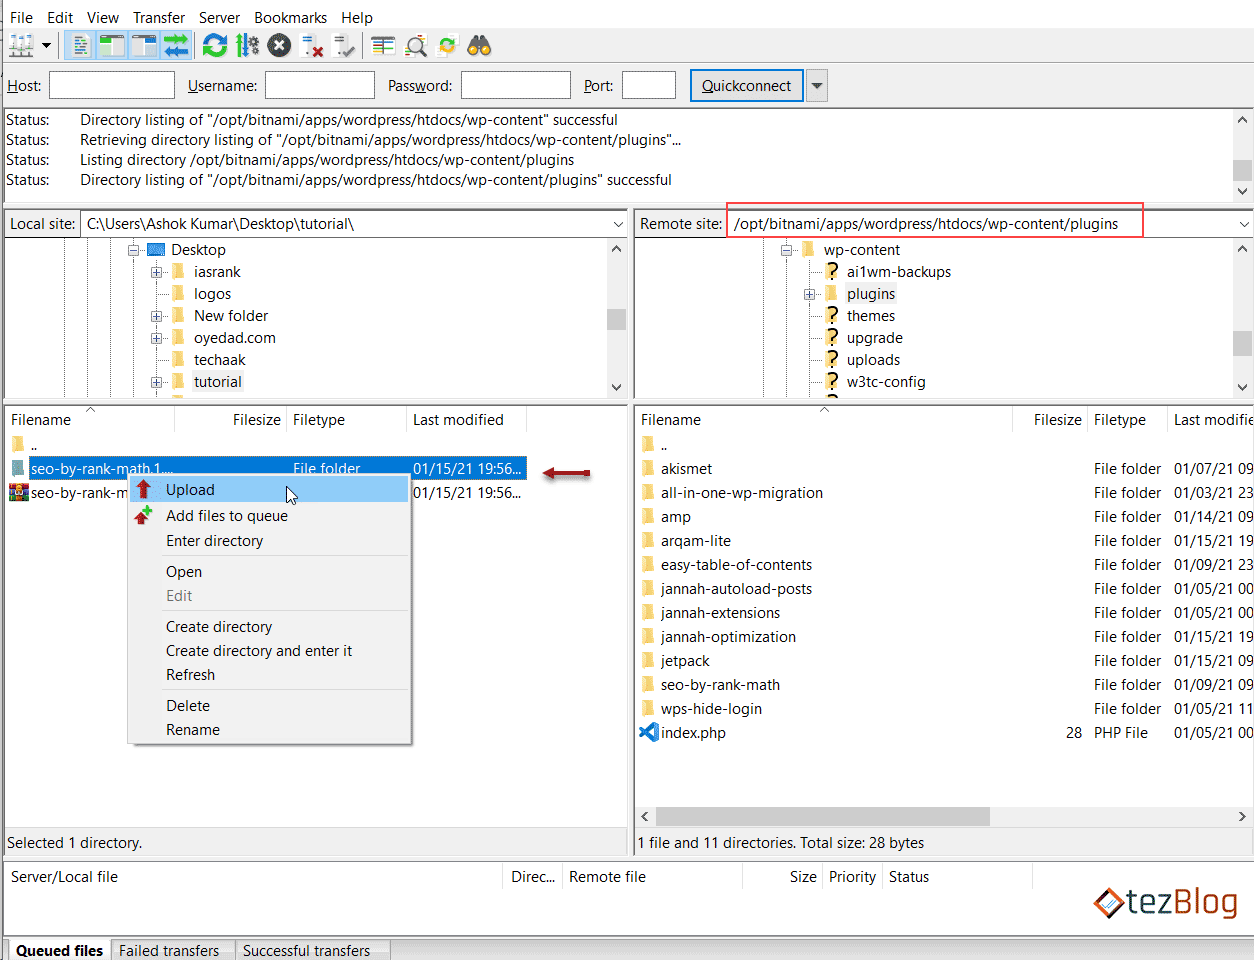
Navigate to the /wp-content/plugins/ directory of the WordPress FTP, and also navigate the unzip plugin folder location on the other side of the window as displayed above. Right-click on unzip plugin folder and choose upload.
Your plugin will be uploaded to the CMS. You can activate it through the WordPress dashboard, as shown below.
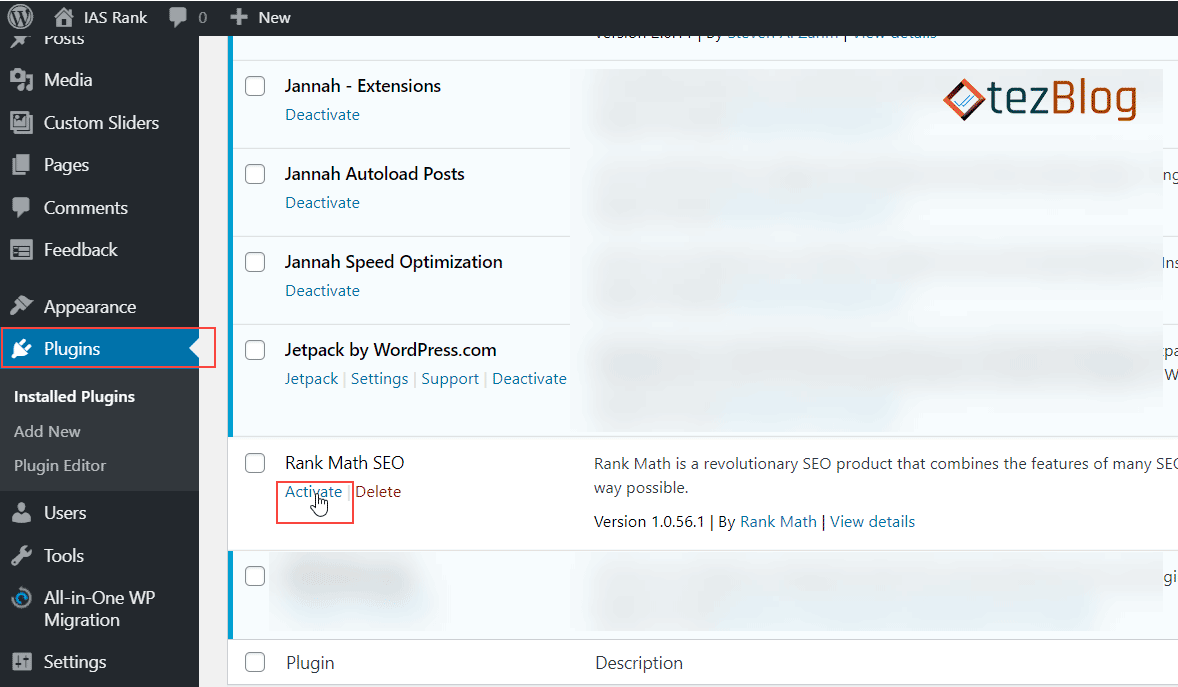
Activate a Plugin in the WordPress dashboard
After clicking the activate button, the plugin will stick with the WordPress CMS and perform its functions.
Some Important Plugins that should be there in a WordPress website.
- Rank Math SEO/Yoast SEO (for SEO of website).
- Akismet(Protect from spam)
- Jetpack (connect with wordpress.com, provide CDN for static content, and much more.
I hope you liked our article on installing a plugin. In case of any doubt or query, feel free to in the comment section provided below.
JOIN THE CONVERSATION
Comments
Have a question or something to add? Comments are moderated and appear here only after approval.
JavaScript is required to submit a comment. Published comments above remain available to read.
No approved comments yet. Be the first to join the conversation.