
You’ve installed WordPress using Bitnami NGINX on the cloud platform, and now you want to add a domain name to the installation. It helps the users to access your application using the domain name of your website.
Domain Name setup Bitnami WordPress NGINX
Setup Domain Name for Bitnami WordPress on Google Cloud
To add a domain name to the WordPress website, you’ve to reserve a static IP Address for WordPress deployment. And only after that process further.
It would be best if you have a domain name for the WordPress website. If you don’t have one, Buy it domain name from the Best Domain Name Providers.
Updating DNS settings
Now login to the domain name provider and edit DNS settings. In DNS settings, you’ve to enter A name and CNAME. That will be for example.com.
- The Aentry would be “@” and Target “your static IP” like 216.239.34.21.
- The CNAMEName entry would be “www”and the target value “@”.
After properly configuring all the above settings, please check that your new settings are updated or not on https://www.digwebinterface.com/. It may take a few hours to propagate all settings; you’ve to wait.
Your WordPress site with Domain is Live Now.
Now you can check your domain example.com which is online. By entering the direct IP address, it is not redirecting to your domain. To solve this, follow the steps guided below.
Updating WordPress URL with IP
Open SSH Terminal of GCP
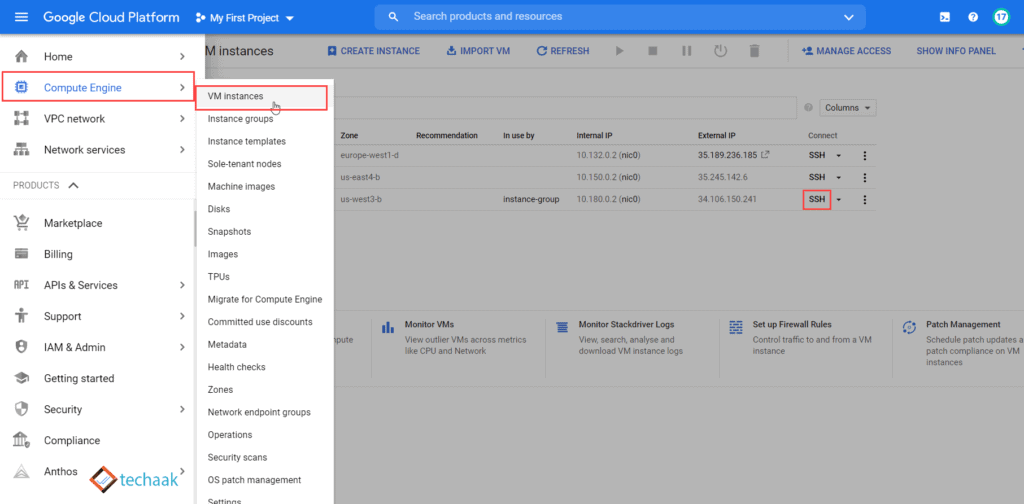
Google Cloud Console SSH Terminal
- Open Google Cloud Console Dashboard.
- Click Compute Engine> VM Instance.
- Now Click on the SSH terminal link.
Now you’ve to define the WordPress application URL in its wp-config.php file.
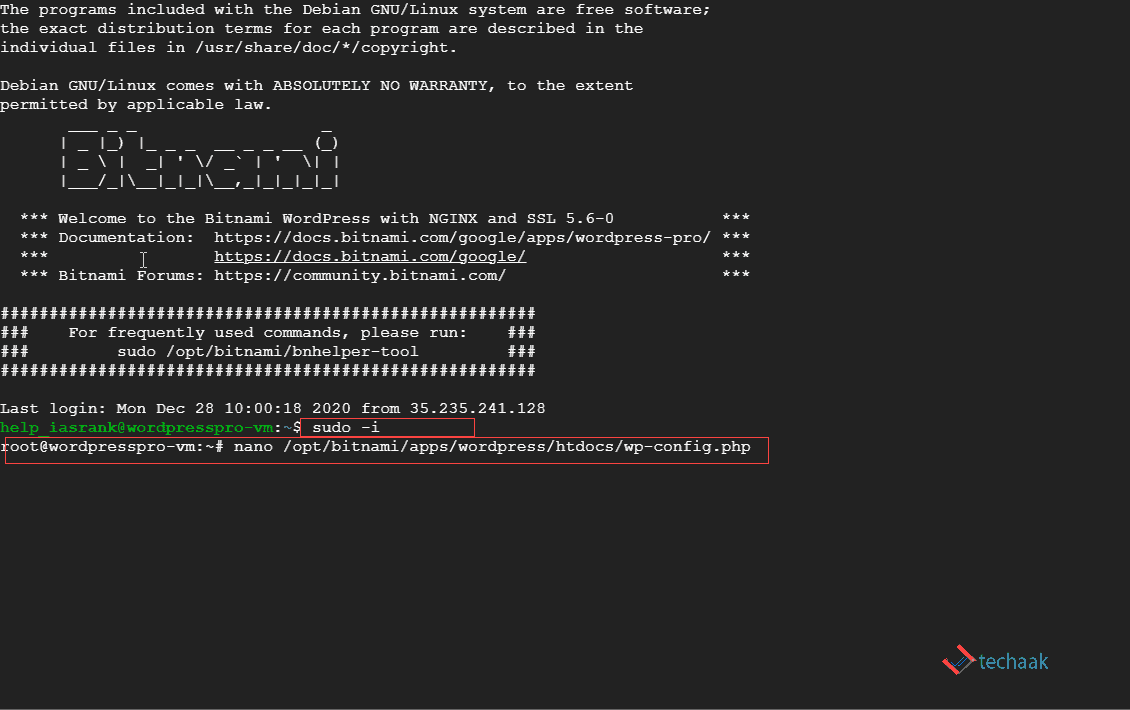
Open wp-config.php bitnami
In the SSH terminal, type the following command (new update)
sudo -i
nano /opt/bitnami/wordpress/htdocs/wp-config.php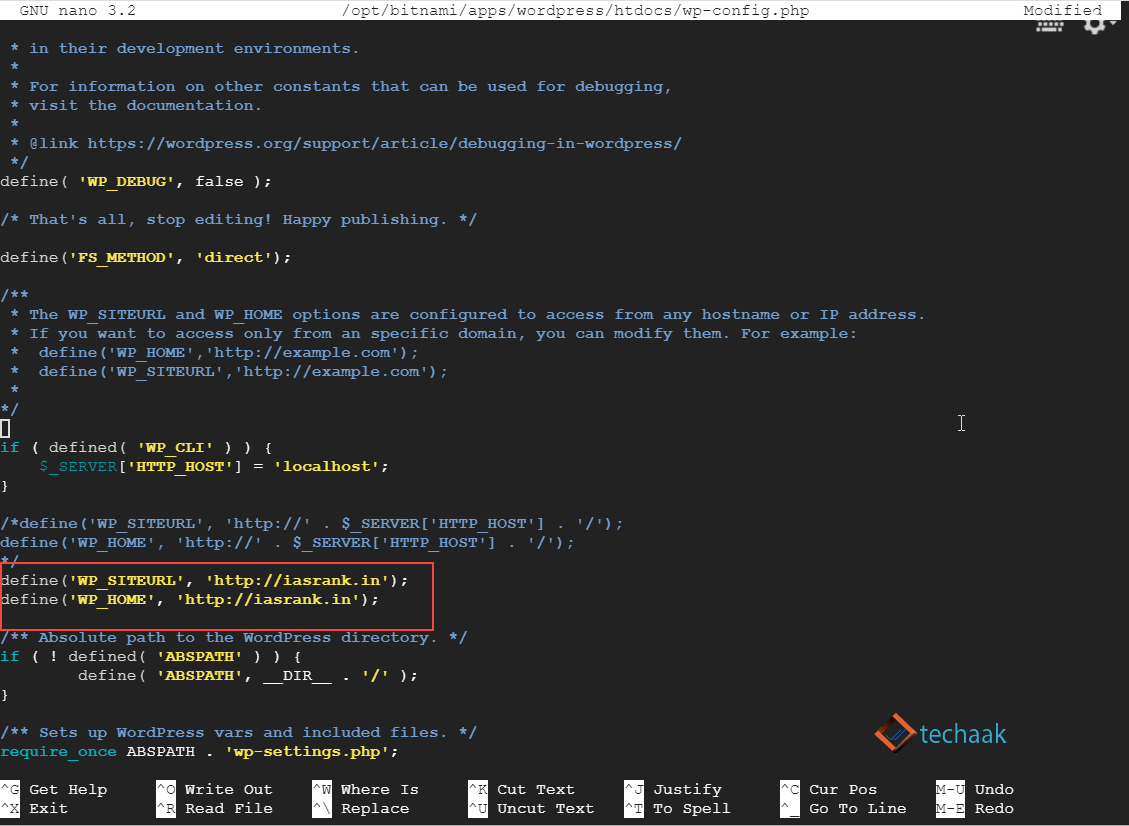
Domain Name Config
REPLACE THIS:

define('WP_SITEURL', 'http://' . $_SERVER['HTTP_HOST'] . '/');
define('WP_HOME', 'http://' . $_SERVER['HTTP_HOST'] . '/');

WITH:

define('WP_HOME','http://example.com');
define('WP_SITEURL','http://example.com');
In the above command, please replace example.com with your preferred domain address like www.example.com. Change example.com with your domain name.
Press ctrl+X(windows) or cmd+x(mac) and then Y to confirm the changes.
NGINX user, Reload the NGINX by the following command.
nginx -s reloadApache user, execute the following command to restart the server.
sudo /opt/bitnami/ctlscript.sh restart apacheYou can access your domain now using the IP address or DNS.
Check the following related to Google Cloud Bitnami NGINX WordPress Settings.
JOIN THE CONVERSATION
Comments
Have a question or something to add? Comments are moderated and appear here only after approval.
JavaScript is required to submit a comment. Published comments above remain available to read.
No approved comments yet. Be the first to join the conversation.